Adapting lenses to Micro Four Thirds - Beginner's Guide and TIPS
One of the greatest things about the micro four thirds camera system is how easy it can be to adapt other brand lenses and even vintage lenses to the system. But if this is something you haven’t tried before, it can be a bit daunting. So here’s a beginner’s guide to adapting lenses.
Crop Factor: what is it and why does it matter?
This article contains Amazon and eBay affiliate links.
Without boring you to tears, the micro four thirds sensor is much smaller than a full frame sensor. It’s a 2x crop, in fact. What does that mean? Well, If you put a full frame 50mm lens onto a micro four thirds body, you’ll get a 2x crop factor, making the actual focal length 100mm.
The crop factor isn’t to be confused with zoom, though. If you see this rather slap-dash illustration I made, you’ll see that the micro four thirds sensor is only capable of seeing a small portion of the scene in the centre of the lens. It gives the illusion of zooming in, but it isn’t. Does that make sense? It isn’t really important to know but that’s what’s going on when you adapt a full frame lens to a smaller sensor camera.
This can be both a pro and a con, depending on what results you want. If you want to get a zoom lens on the cheap, you can use this to your advantage and effectively double any focal length you throw at your camera. The downside is the image clarity may suffer. See, the micro four thirds sensor is suuuuper pixel-dense compared to a full frame sensor. Meaning if there are any discrepancies in the glass, they’ll stand out a mile on the m43 system if you adapt the glass passively.
OK. Enough boring theory. Here are the two (three?) ways you can mount other brand lenses onto your micro four thirds system.
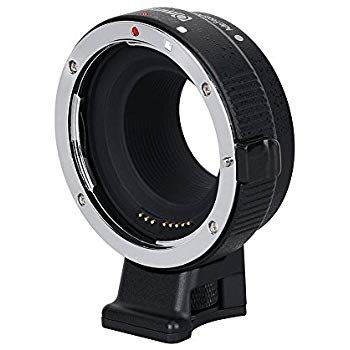
Passive adapting
This is the cheapest way to do it. You essentially buy a cheap metal ring that swaps the mount type from whatever brand lens you are using to micro four thirds. This method gives you that full 2x crop, which we’ve mentioned can be a pro and a con. This method can make your images less sharp, though not unusable by any means.
But it can also make otherwise normal lenses completely unusable in a different way. If you have a 100mm portrait lens for instance, it will suddenly become a 200mm unwieldily mess when it’s passively adapted. In fact, getting adapted lenses to cover the more conventional focal lengths — like 35mm or 50mm in full frame terms — is very hard because of the cropping business.
I have used passive adapting to my advantage in the past though. I’ve passively adapted a Sony A mount Tamron 90mm f2.8 macro lens to my m43 gear. Suddenly I have this INSANE 180mm macro lens that’s just stupidly close to the subjects. Passive adapting can be brilliant for macro.
Passive Adapting
Pros:
Cheap!
Doubles the focal length of your lens
Cons:
Less sharp image quality
Doubles the focal length of your lens
One more boring but necessary thing to understand about different brand lenses is flange distance. Aside from being one of my favourite words in the world (flange! *snort*) it’s quite important to grasp the basic idea. Here is my very basic, very non-scientific, explanation. If you guys can do better (I’m sure you can) please leave a comment at the end!
The flange distance of a camera system is the distance the lens element needs to be from the sensor/film to focus properly and function properly.
So what does this mean for adapting lenses? Well, the thickness of the adapter ring can play havoc with your flange distance. It can make the lens too far away from the sensor, or too close, meaning that the focus markings on the lens are now completely inaccurate. It’ll mean you might not be able to focus to infinity at all.
The good news is, the brainy people who’ve made these adapters have probably already figured out the correct flange distance for us. So read a few reviews on the adapter ring you want to buy and see what people are saying. If there are any focus issues, steer clear!
It is because of the flange-y stuff that not every lens type can be adapted to m43, and why some lens types are a pain in the butt to adapt when others are super simple.
OK. So maybe passive adapting isn’t the solution for you. How about…
Adapting lenses with a focal reducer.
This method is my fave, and probably the best route to go with if you want the best results. It’s also a bit more pricy.

So what’s the difference? Well, a passive adapter is literally a ring of plastic or metal that connects your camera to a lens. A focal reducer is a ring of metal with a glass element as well. The purpose of this glass is to minimise the crop factor! I hope you’re still with me. I am aware that this subject is both head-mashy and boring. Go grab a coffee or a strong cocktail.
So with a focal reducer, instead of the crop factor being 2x, you get a much more manageable crop factor of 0.75x. A real world example would be if you wanted to adapt a full frame 50mm lens:
Passive adapting (2x crop) the effective focal length would become 100mm.
Focal reducing (0.75x crop) the effective focal length would become 75mm.
As you can see using a focal reducer will make your full frame lenses much more manageable. But wait, there’s more! Because the glass element in the focal reducer is squeezing the image from the lens — making it smaller — the image quality will be a lot sharper too. Any quirks with the lens quality (especially on older glass) will be much more forgiving.
But wait, there’s more!
Another massive benefit of using a focal reducer is… and hold on to your pants… it also boosts the aperture of the lens. Here’s where things get interesting.
Most focal reducers, or, SpeedBoosters as they’re also known as, will generally give you around a stop of extra light. That’s a ton of extra light.
So an f5.6 lens suddenly becomes an f4 lens.
An f2 lens suddenly becomes an f1.4 lens.
So this option sounds perfect, right? Well, it certainly is awesome. But there are some things to consider.
The vast majority of more affordable focal reducers are manual focus. So you’ll need more time to set up your shots before taking them.
And any time you add a new element of glass into your chain, whether it’s a focal reducer or a filter (this is why we don’t buy cheap filters guys!) you are always running the risk of losing image quality. Your image quality is only as good as the worst part in the chain.
If you get a cheap focal reducer, or a cheap filter, it’s like shooting a £4000 lens through a car window. It’ll affect the image quality to some degree. It might be a little, it might be a lot. It’s just something to consider.
One thing I’ve noticed when adapting my own lenses, with the Camdiox adapter, is that the image quality suffers when flares are involved. Shooting a sunset or back-lit shot with this focal reducer can lead to nasty flares, and big blue circles right in the heart of the image. Here are some of my favourite photos I’ve taken with my Canon FD lenses:


Cheap ain’t always great
There are cheap focal reducers on the market, and I use them myself. They do come with drawbacks. The more expensive versions, like the Metabones branded ones, will be much better with flares etc. But it all depends how much you want to spend.
Option three (?)
It’s a focal reducer again, but some more expensive Metabones adapters actually allow auto focus. The auto focus performance might not be as good as a native lens, but it does work. This is the most expensive style of lens adapter, and it’s up to you whether you value auto focus enough to go for it.
Bear in mind, sort of obvious point but I’ll say it anyway: You’ll only need this style of adapter if you’re adapting modern lenses, like a Sigma or Canon lens to the system. If you’re only interested in vintage lenses, they’re manual focus anyway so you can save yourself come pennies.
Which lenses are worth adapting?
In the modern lens category, the industry standard combo seems to be the Sigma 18-35mm f1.8 with a Canon EF Metabones adapter. The speedbooster will make the aperture of this lens even more impressive, and the focal reducer will make this lens the perfect stock lens for micro four thirds.
I believe this is currently the fastest stock lens you can get on micro four thirds, so there’s a reason why it’s so popular. The downside is it is pretty hefty. It’s quite front heavy so it limits the sorts of gimbals you can use this setup on. And depending on which style of adapter you go for, you may be stuck with full manual focus.
Canon EF lenses are really popular to adapt. Especially the prime lenses. You can get a Canon EF 50mm f1.8 for super cheap, and with the speedbooster you get even more bang for your buck.
Older 4/3 lenses are pretty easy to adapt. They’re relics from the “four thirds” system which sort of died a death before m43 was born from the ashes. The lenses are still available second hand, and you can adapt them pretty simply.
What about vintage lenses?
Well, I personally love the Canon FD lenses. They’re simple to adapt and there are plenty of cheaper branded focal reducers on the market. I have a Canon FD 50mm, 28mm, and a 100mm f2.8, and they’re all a bit sexy.
Olympus OM lenses, from their old 35mm film cameras, have a tricky flange distance. It is possible to adapt them, but the focal reducers are a bit few and far between. A handy hack is to use a Canon EF focal reducer, then buy a thin passive EF to OM adapter ring, and use them both together.
There are a few different price-points to consider:-
As you can see, some of these aren’t cheap! You don’t really want to be buying a focal reducer for every single mount under the sun. That would add up fast, even if you went for the cheaper options.
Here’s a tip for you: to get the most bang for buck, investing in one m43 to Canon EF focal reducer and then adding on thin passive adapter rings is a great workaround to access a lot of different mounts. You can do this method for tons of mounts, including M42 lenses, as well as Pentax PK lenses.
Pentax 110 lenses
Pentax 110 lenses are a DREAM to adapt, because the Pentax 110 used a micro four thirds-sized film — the 110 film — so there’s no need to focal reduce! I’ve had a blast with these lenses and managed to pick up a full set of them very cheaply on eBay. Have a look at my full review of them here. It only takes a cheap passive adapter ring and you’re good to go.
C mount lenses
C mount lenses are fun and cheap. They’re usually on CCTV cameras or older 16mm film cameras. They’re small and very easy to adapt to M43. You can do this passively just fine.
Other lenses — vintage or otherwise
There are more adapters available than I can list. These are some of the most tried and true combinations, but if I haven’t listed something you’re interested in, by all means give it a Google. “___ To m43 focal reducer” or “____ to m43 adapter” should get you started in the right direction.
Conclusion
Adapting lenses doesn’t need to be scary. It’s perfectly fine to do — it won’t damage your camera — and it’s a very affordable way to expand your lens collection considerably.
I also love the look of vintage glass. You can get some real gems. My 100mm f2.8 portrait Canon FD lens is so nice. And I got it for under £100. Anything that tasty in a modern lens would cost 2, 5, or even 10x that amount.
Pick a specific mount to begin with, and keep an eye out when you’re out an about. Car boot sales, markets, charity shops etc can become a gold mine for new fun lenses to try.
Check out:-