Paint powder photography: Tips, Tricks, Mistakes
I’ve been dying to do a shoot like this for ages. There’s just something ridiculously fun about getting messy with your mates in the name of art. Here’s a behind the scenes look at the paint powder photo shoot, and some tips I learned along the way.
The Brief
I wanted to experiment with some ideas, but I also have this one specific image in mind. I wanted to make a composite image of me holding my camera, getting bombed with paint powder. I didn’t have high hopes of succeeding — all these stuff is split-second photography — but I am honestly so happy with how it turned out! As well as the other images from the day. I’ll get to the How To later on with this particular image.
Paint Powder Photography — the best styles
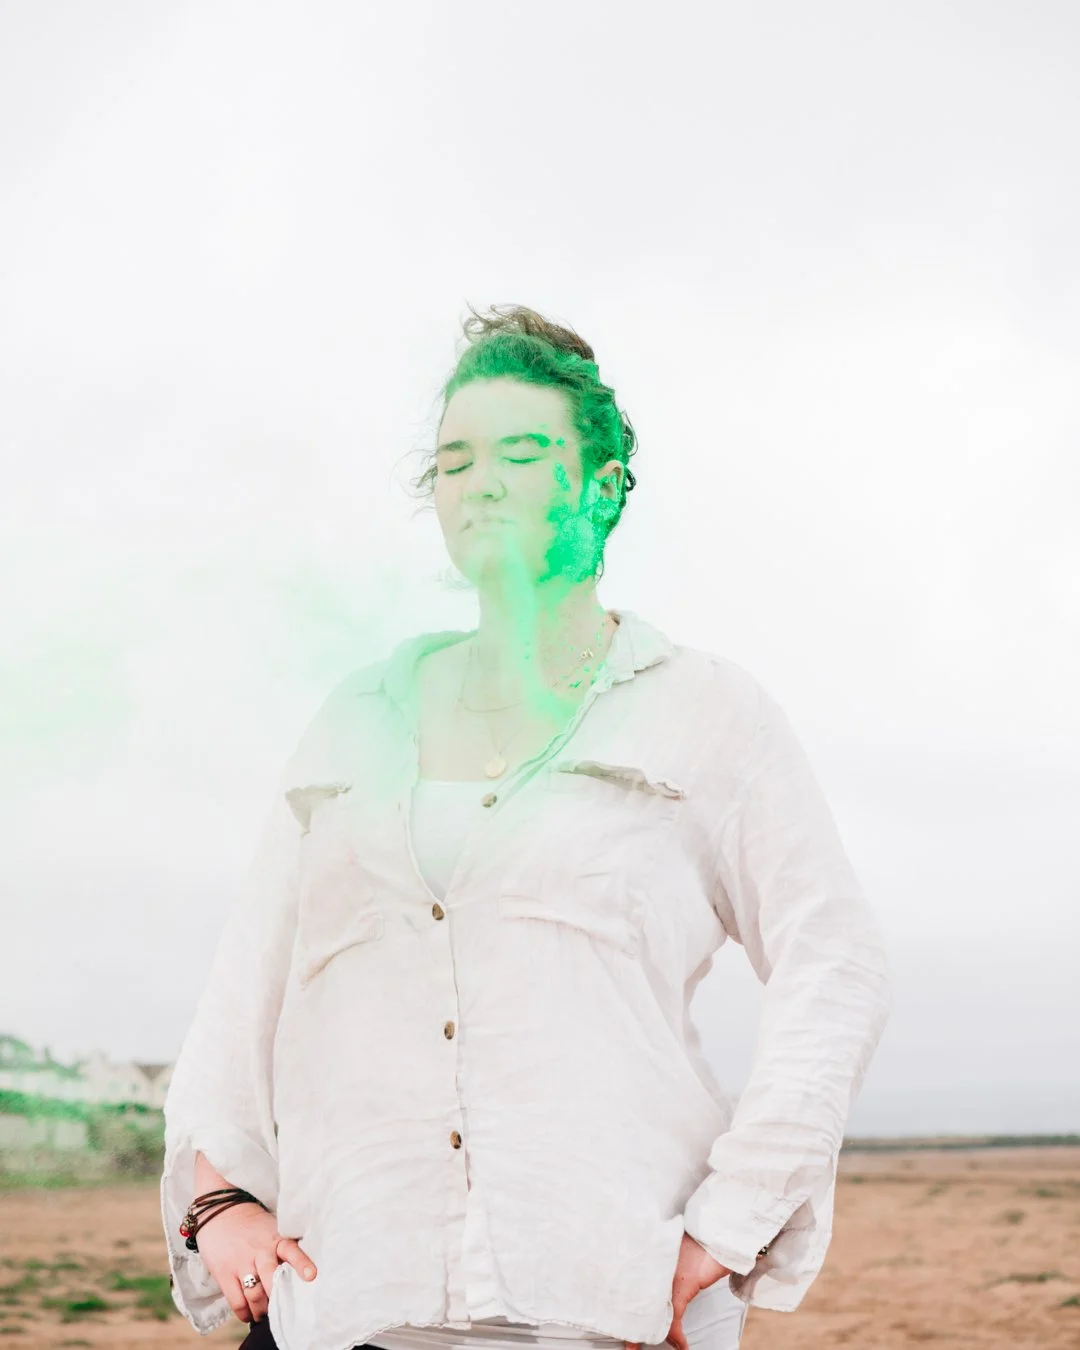
Generally speaking I think you have two styles to go for that work most effectively. You can go for the tranquil, peaceful facial expression that is juxtaposed with the chaos of the paint.
Or you can go for some action. Some movement. Something kick-ass. I’ve seen some amazing examples from dancers and boxers. Unfortunately I’m not nearly that graceful so I had to make do with whipping my hair about.
Paint Powder Photography — your environment
This stuff gets everywhere. It really does. So I think outside is probably wise, and away from anything that might get stained. It’s general curtesy, I think, to bring a tarp if you’re going to be shooting in a public area. On the beach, I think we got away without a tarp because the sand ate the paint powder pretty quickly. But just be respectful of your environment.
Also be mindful of wind. Even a slight breeze can mess up your shot. So some shelter is great. If you don’t have shelter, then angling your subjects so that the wind works in your favour is probably the best compromise you can get. We threw the powder into the wind. This worked well because it thrust the powder at our subject… but then it went straight past them and headed straight for the camera. Your camera WILL get messy, so make sure you pick your lens choices in advance. You don’t want to be switching out lenses with this in the air.
I took two cameras. I had the 12-35mm 2.8 Lumix stock lens on the GH5, and then the 35-100mm 2.8 Lumix zoom on the Lumix GX80. This way I covered all my focal lengths and made sure I wouldn’t need to change lenses. Both sensors appear to be clean, so yay! It worked.
Paint Powder Photography — Natural Light or Flash Photography?
I tried both. They both have their pros and cons. I started with high speed sync, off camera flash. I used the Godox AD200 pro, which is just insanely good. There’s a reason it’s the industry standard. You can go up to mental shutter speeds without a problem. The flashgun illuminates the particles in the air and just looks superb. The downside? You only really get one shot per attempt to get the image you want. If you have a finite amount of powder, time, or patience, this can be tricky.
I tried off camera flash for a bit but I couldn’t get the timing exactly right. So I opted for natural lighting. I reckon any shutter speed over about 1/500th will get the job done, but faster is always better.
I used high speed burst mode, and if you have a mirrorless camera, it can be a good idea to switch to electronic shutter to get even more frames per second. This is absolutely almost foolproof. If your subject strikes the right pose, and your powder hits right, you’ll get the shot. The downside is the lighting isn’t quite as cool as with off-camera flash. But it’s still pretty good.
Throwing tips
Keep your hands into fists if there is a breeze. Use the wind to your advantage.
Don’t throw the powder in front of the subject because you can hide their face. Behind them onto their shoulders looks brilliant and then they won’t get it into their eyes.
Ear plugs might be a good shout if you can hide them with the subject’s hair. The powder really does get everywhere!
Contrasting colours work best if you throw more than one at a time
You can rest the powder on someone and then they’ll move and disrupt it (like my whipping hair shot.)
Paint Powder Photography — Why you should use a tripod
Let’s talk about my composite shot! I am so happy with how it turned out! I framed the shot myself on a tripod, and drew a line in the sand for myself so I nailed the focus. Then my lovely friends took some shots of me holding my GH5 to my face. Then they took it from me, and I tried to remain perfectly still. They then took great pleasure in throwing handful after handful of powder at me. It’s quite hard to remain relaxed, let me tell you, but I think I did a decent job!
And here’s my top tip: USE A TRIPOD! Why? I hear you asking. The shutter speed is going to be stupid-high anyway, why need a tripod? Well. Here are my thoughts on the matter. This stuff is hard. You might get a perfect shot of the powder hitting just right, but your subject winces. You might get a perfect expression on their face but completely miss with the powder. If you use a tripod, and your subject stays relatively still, you can always stack your images in post production, and pick out the best elements from each attempt.
I wish I’d have done this for all the images on this day and not just my own. But I learn and make mistakes so you don’t have to!
Powder Tips
Now for the powder. I bought the Holi powder from Amazon here. It’s cheap as chips. I then mixed about half of it with my own flour to bulk it out. I also mixed some new colours, making purple for instance. Get as much powder as you can afford because the more you have the more attempts you can try. More powder always looks better than less.


Tips in a nutshell:
Use a tripod. Seriously.
Pick your spot respectfully and tidy up after yourself
Speaking of, brush off as much powder as you can before getting it wet
And when you get it wet, use cold water so it doesn’t turn into paste
Pack towels and spare clothes and make sure your car seats are covered!
Shelter is your friend. Even a light breeze can be a pain
Don’t change lenses on location once you’ve started! Use two cameras if you have them
Burst mode will be your friend. Electronic shutter will make bursts faster
Motion and action works wonders with this style of photography