
Off-Camera Flash Photography FOR BEGINNERS
Off-camera flash — or strobist — photography is such a cool effect. It can seem quite intimidating if you’ve never used flashguns in this way before. But once you know a few key things you’ll be all set. So here’s a beginner’s guide to off-camera flash.
There’s a video version of this article at the end of this post.
Why Off-Camera Flash?
Using flashguns off-camera gives you so many more creative opportunities. You can set your flashguns in different styles and combination (which I’ll cover a bit later) to achieve some seriously professional looking results. They’re also small, battery powered, and affordable. There really is no excuse to give them a try!
If you’re completely new to flash photography you can check out part one here, which covers on-camera flash.


Off-Camera Flash — how do you trigger your flashguns?
There are a number of ways, all with some pros and cons. The cheapest way is to put your off-camera flash into Slave mode, and trigger it by using your pop-up flash on your camera. Whenever there is a flash of light, your off-camera flash will also trigger. It’s quick and simple — sure — but it isn’t the best option. Triggering your shots this way isn’t the most reliable. Flashes can very easily get lost in direct sunlight for instance. Or you might want to angle your flashgun in a way that conceals its sensors, like behind your subject for instance. So you can do it this way… but… just don’t. Look at these next two methods instead.
Remote Triggers
These are separate products you can buy that you can attach to your camera and flashguns. The range on these devices is really great and reliable, and you can even usually turn the flashguns on and off from the camera without moving (which is important and I’ll tell you why in a bit).
However, it’s one extra thing to bring, charge, and rely upon. I used this method for many years — very successfully! — But have since moved onto…


Built in Remote Triggers
My flashguns (the Yongnuo 560 mk VI) now have build in receivers, and you can buy a controller trigger to control them all. This comes with a cool light up display that you put on your hotshoe. From there you can not only turn your flashguns off and on independently, but even change their intensity, without moving! Marvellous!
These packs aren’t as expensive as you’d think so definitely check them out on Amazon here.
How to set up off-camera flash on a stand
To have your flashgun on a seprate stand, you’ll need a lightstand. These can be pretty cheap. If you want more control in positioning, or to add diffusion (which I’ll cover later!) then investing in an attachment like this one is ideal.
Then you might want to also invest in some diffusion, such as umbrellas or mini softboxes.
… And that’s about it, really. Super simple.
How get the exposure right when working with one or more off-camera flashguns
Just like in part one, with on-camera flash, you’re going to want to use the manual settings of your camera to expose the background however you want it. If that’s a cool sky, then you’ll likely be underexposing your subject, but that’s fine; that’s where the flashguns come in. So:
Without any flashguns on, expose the background how you would like it. Take a test shot.
Then LEAVE YOUR SETTINGS ALONE.
Then, add in each flashgun, one by one, and see how they affect the image. With slave or remote triggers, this can result in a lot of lowering the lightstands, adjusting the flashgun settings, and putting everything back, which is why I love being able to do this remotely.
It is incredibly important to get each light working independently before adding in more layers of light. If you turn them all one at once it’ll be a mad house.


How to configure your off-camera flashguns
Here are just a few examples, I am sure there are many more.
One off-camera flash
Having your flashgun on a lightstand at a 45 degree angle to your subject gives some classic, solid lighting. One side of the subject will be slightly brighter than the other, which adds depth, contrast, and interest to the image.
A great tip for this one light setup is to utilise the sun if you’re outdoors. Use it as a hair light, then fill in the front of the subject with flash. You could also do it the other way around, and have the sun as a key light, and a cool flashgun hair light.
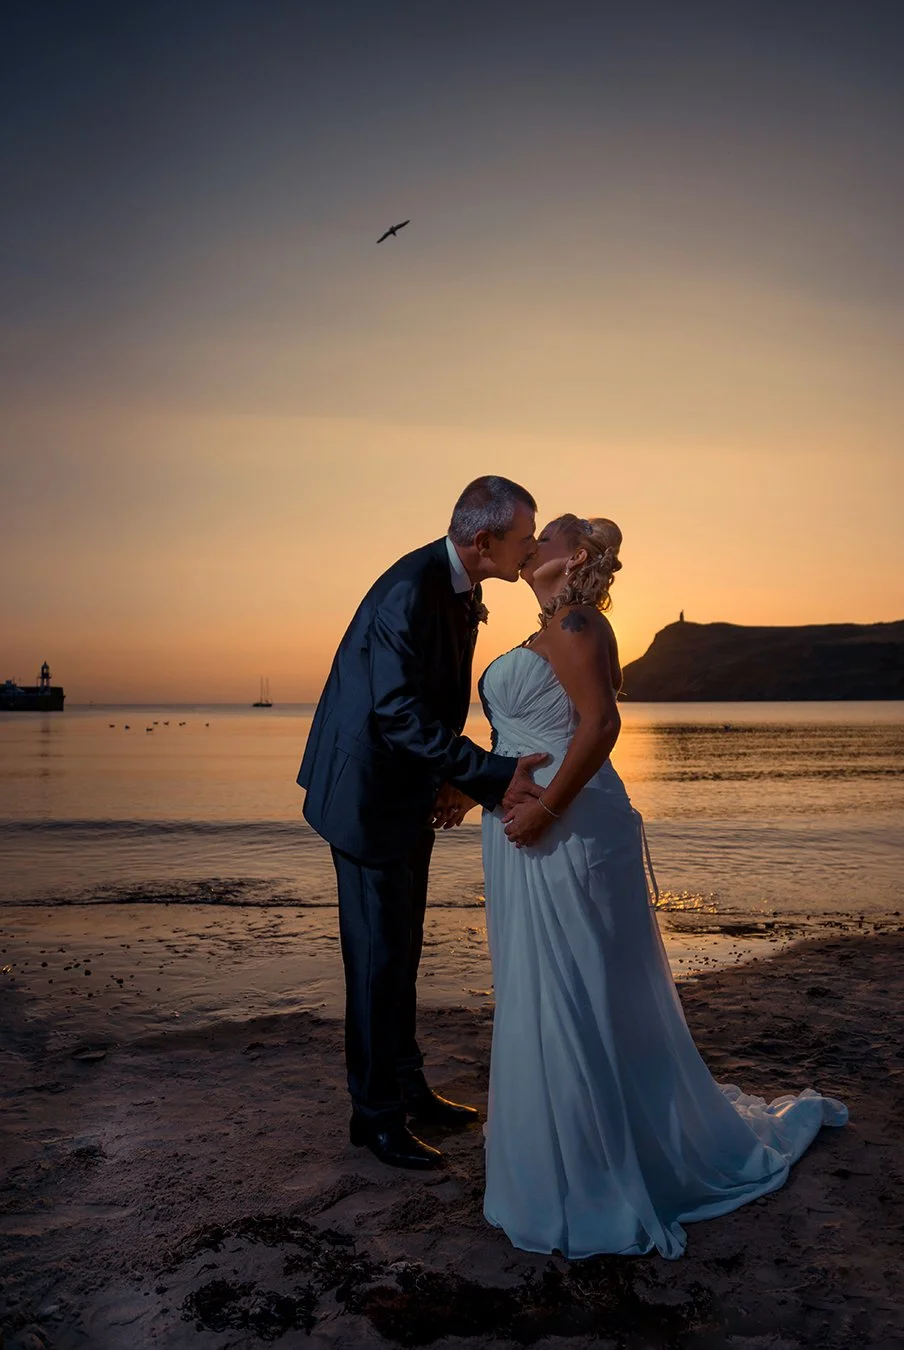
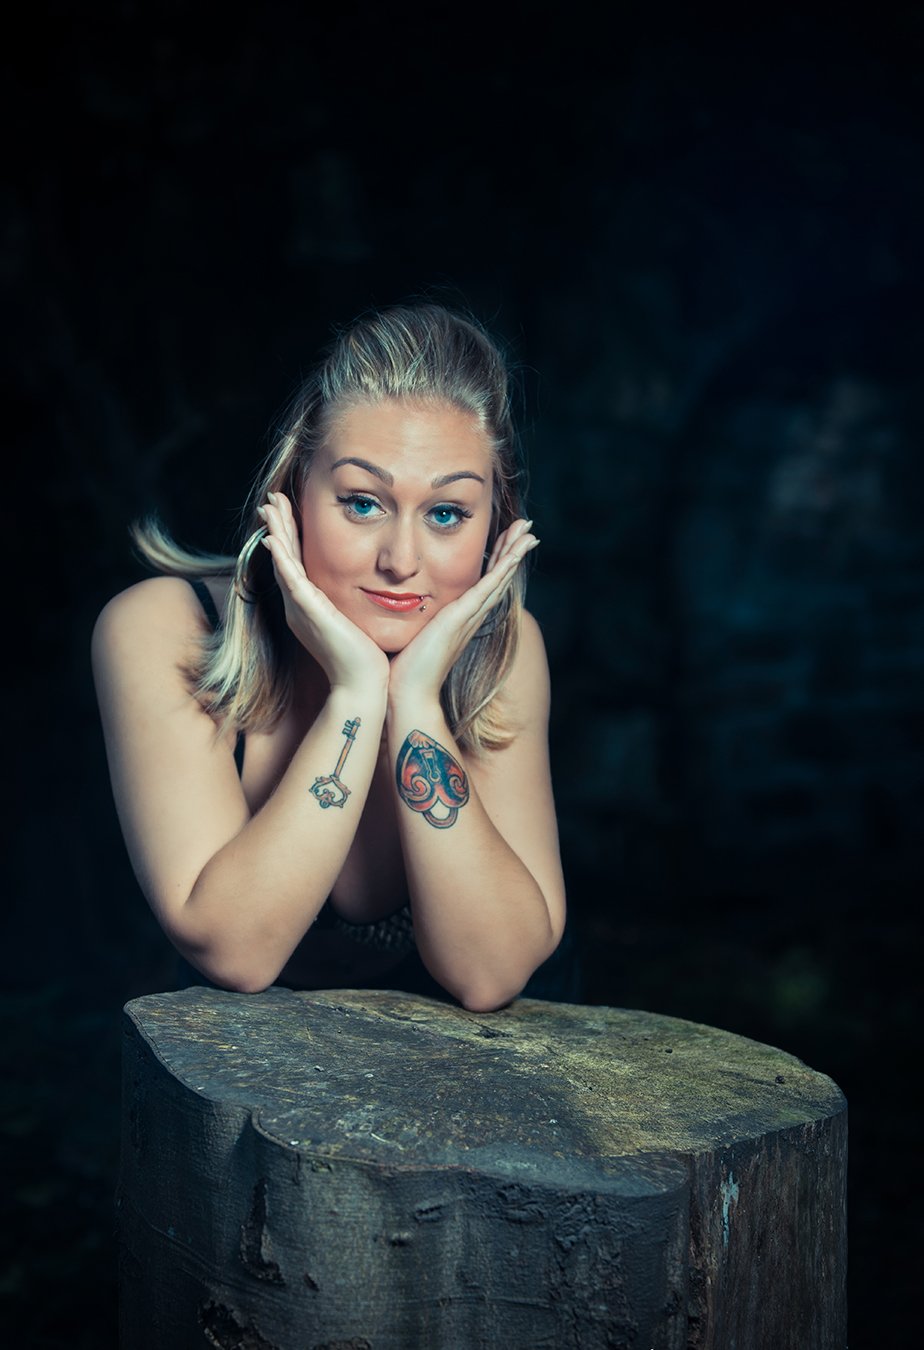
You can also completely backlight your subject, by putting the flashgun directly behind them. This is especially cool outside at night.
The great thing about flashguns is they’re so small and easy to stash in cool places. I shot these images with just one flashgun taped inside the umbrella. Cool effect, right? Super easy to achieve.


Two lights
If you’re indoors, or the sun isn’t cooperating, then key light/hair light is the classic combo. Having just one light indoors can sometimes make the subject feel pressed into the background. The hair light adds depth and lovely separation.
You can put illuminate a white cloth or card backdrop with two flashguns. Put one behind (as far back as you can: the further back that light is, the more the backdrop will blow out evenly, which is what we want). Then use the second light as a key light.
You can also add a flare into your image for effect. I do this all the time during first dances. Have your key light as normal, then angle the second light at your camera. Put the subject in between. If they block the back light they end up backlit and looking awesome, if they move and the light comes through, you get an awesome flare. Win win!
Top Tip: The intensity of the flare is controlled by your aperture. If you want a dinky little star of light, stop down to f11 or so. If you want a large flare with lots of tail, open up that aperture.


Three lights
This is a great, portable way to recreate the traditional key light/ fill light/ hair light combo. You have a light behind the subject, then one at 45 degrees left and 45 degrees right. One is brighter than the other so there is a contrast on the face, but it is filled in slightly by the… well. By the fill light. Lovely effect.
There are many combinations, but hopefully these should give you an idea. Once you’ve mastered the basics the rest is just your imagination.
Diffusions and Modifiers
Flashguns are pretty harsh. I like to shoot through white umbrellas. You can also use silver reflective umbrellas too for a bit more shimmer.
There are all kinds of diffusers on the market, including little softboxes, big softboxes, ring flash attachments etc etc. I’d start with a nice simple white umbrella and work up from there.
The harsh look can work really well if you’re shooting sports, or more masculine power-pose sort of shots. But generally, diffusion is the future.
You can modify the angle and colour temperature of your light with modifiers. Wrap a cone around your back light, point it at the wall, and suddenly you have this beautiful spotlight, with a nice natural falloff at the edges of the frame. There are products you can buy to do this, or you can go wild with some cardboard and tape.
Colour gels are a fantastic way to make a scene pop. Have a cooler temperature back light and a warmer temperature key light and things get interesting very quickly. You can even go all Game Of Thrones, and light half the subject’s face warmer and the other half cooler.


Here are my flashguns of choice right now. They’re done me so proud over the years!
Off-camera flashes are absolutely loads of fun. You can turn any place into a photoshoot. If you’re shooting a wedding and it starts to rain? Fear not! We have an awesome portable studio right here with us.
There are some top tips in Part 1 of this article, which definitely apply here too, so make sure to check that out if you haven’t already.